Architectural Model Surface Polishing Process
Introduction
A rough edge ruins the illusion.
Scratches on a glass facade distract the eye.
A cloudy water feature looks fake.
The difference between an amateur model and a professional one is often in the finish.
That is theArchitectural Model Surface Polishing Process.
This guide explains how professionals transform raw materials into crystal‑clear, mirror‑smooth surfaces.
From sanding acrylic edges to buffing resin water.
From flame polishing to high‑gloss clear coats.
Let us begin.
Why Surface Polishing Matters
Surface polishing is the process of smoothing and enhancing a component’s finish by removing microscopic irregularities.
In architectural model making, polishing serves several critical functions:
Aesthetics– A polished surface catches light beautifully and looks premium.
Clarity– For acrylic windows and water features, polishing removes cloudiness and restores transparency.
Durability– Smooth surfaces resist dirt and are easier to clean.
Perceived quality– Clients notice the difference between a rough‑cut edge and a mirror finish.
For aTransparent Glass Building Sand Model, the quality of the acrylic polish determines whether the facade looks like real glass or cheap plastic.
Understanding Acrylic: The Most Common Material
Acrylic (PMMA) is the material of choice for glass facades, windows, and water features.
It offers optical clarity (92% light transmission) and can be polished to a glass‑like finish.
Not all acrylic is the same.
Cast acrylic polishes beautifully and resists yellowing.
Extruded acrylic is less expensive but more prone to stress cracking and heat damage during flame polishing.
The Polishing Tool Kit
| Tool | Use |
|---|---|
| Sandpaper (180–3000 grit) | Progressive smoothing |
| Sanding block or flat surface | Even pressure distribution |
| Polishing compound | Fine abrasive for buffing |
| Microfiber cloth | Final buffing |
| Buffing wheel (cloth or felt) | Machine polishing |
| Small butane torch | Flame polishing (edges only) |
| UV‑curing glue | Repairing cracks before polishing |
For resin water features, a magnetic polishing machine can be used for water surface planes.
This specialized tool creates a perfectly smooth, glossy finish on epoxy resin lakes and rivers.
The Complete Surface Polishing Process
Step 1 – Assess the Material and Defects
Before polishing, inspect the surface:
Laser‑cut acrylic edges may have slight yellowing or micro‑cracks.
Router‑cut edges will have tool marks.
Resin water may have bubbles or uneven areas.
Painted surfaces may have orange peel or dust nibs.
Different defects require different starting grits.
Step 2 – Progressive Sanding
Sanding is the foundation of all polishing.
The goal is to remove scratches from the previous grit until the surface is uniformly smooth.
For Acrylic Edges– Using high‑precision laser cutting technology for building components ensures a clean starting edge. Then, theArchitectural Model Surface Polishing Processbegins with sanding usingwet/dry silicon carbide sandpaperin progressive grits.
Suggested progression:
180 or 220 grit – Remove saw marks or laser charring.
320 grit – Smooth the surface.
400 grit – Prepare for fine polishing.
600 grit – Final smoothing before buffing.
Between grits, vacuum away dust and use raking light to check for scratches.
Overhead light hides imperfections; raking light reveals them.
Pro Tip:Wet sanding helps prevent clogging and keeps the acrylic cool – acrylic softens at approximately 85°C, well within the range of dry sanding friction.
For Resin Water Features– For aSimulation Water Landscape Sand Table Model, the polishing process starts with400 gritto remove unevenness, then progresses through 800, 1200, 2000, and finally 3000 grit for a mirror finish.
Always sand wet to lubricate the surface and prevent resin dust from clogging the paper.
Step 3 – Polishing (Fine Abrasion)
After sanding, apply a small amount of polishing compound to a clean, soft cloth.
Buff in circular motions until the surface becomes shiny.
For machine polishing, a cloth buffing wheel coated with polishing compound produces a consistent, high‑clarity finish.
Machine polishing is ideal for large, flat surfaces or repeated parts.
For Resin Water– After reaching 3000 grit, a final buff with a polishing compound creates a deep, glassy shine that mimics real water.
Step 4 – Flame Polishing (for Acrylic Edges Only)
Flame polishing is the fastest way to achieve a crystal‑clear edge on acrylic.
It uses a hydrogen‑oxygen flame or a small butane torch to briefly melt the surface, allowing surface tension to create a smooth, glossy edge.
Technique:
Hold the torch at a consistent 90‑degree angle to the edge.
Move the flame smoothly along the edge – do not linger.
Let the flame “lick” the acrylic; direct contact causes bubbling.
Flame polishing is best for simple, straight edges where speed matters.
It cannot reach into crevices, and extruded acrylic may craze under heat.
For the highest cosmetic finish, sanding and buff polishing is the better choice.
Step 5 – Hand Buff Polishing (Premium Finish)
Buff polishing is the most presentation‑grade option and typically follows sanding or machine polishing prep.
It uses a rotating cloth wheel and a polishing compound to gradually smooth the surface and achieve a high‑gloss finish.
Hand buffing is the method of choice for:
Furniture‑grade edges and show faces.
One‑off prototypes and premium pieces.
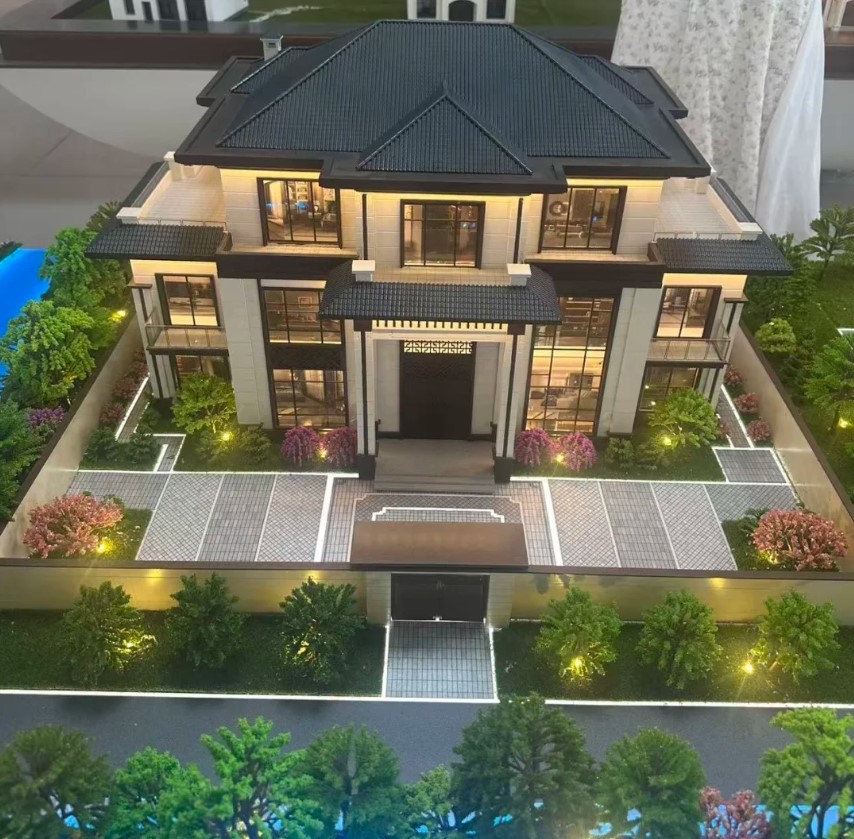
For aHigh Gloss Finish Architectural Sand Model, hand buff polishing creates the reflective, mirror‑like surface that communicates luxury and precision.
Step 6 – Diamond‑Tool Machine Polishing (High‑Volume Consistency)
For production runs of multiple identical acrylic parts, diamond‑tool machine polishing produces a high‑clarity finish with excellent repeatability.
It is best for:
Long straight edges and uniform bevels.
Thick acrylic edges requiring a clean, consistent finish.
A diamond edge polisher rotates diamonds at high speed over the surface, followed by a buffing process for an even higher quality polished finish.
Material‑Specific Techniques
Polishing Painted Surfaces
Painted surfaces can develop “orange peel” texture or dust nibs.
For aHigh Gloss Finish Architectural Sand Model:
Lightly wet‑sand with 1000–2000 grit to remove imperfections.
Buff with a polishing compound.
Apply a fresh clear coat for deep gloss.
ForRoad And Bridge Sand Table Model Craft, road surfaces are not polished – they should remain matte like real asphalt.
However, the guardrails, streetlights, and bridge cables may be polished for a metallic sheen.
Polishing Resin Water
For aSimulation Water Landscape Sand Table Model, resin water requires careful polishing:
Sand wet with progressive grits (400 → 800 → 1200 → 2000 → 3000).
Use a soft foam interface pad for curved transitions to avoid flat spots.
Buff with a fine polishing compound.
For added realism, apply a high‑gloss clear coat over the polished resin.
The result is water that looks deep, clear, and shimmering – a centerpiece of any landscape model.
Restoring Aged Surfaces
Over time, polished surfaces can dull from cleaning scratches or UV exposure.
Sand Table Model Anti Aging Maintenanceincludes repolishing faded acrylic, resin, and high‑gloss painted surfaces.
A fresh clear coat extends the life of the finish.
Integration with Other Model Elements
A polishedTransparent Glass Building Sand Modelreflects the water below, while a polished resin water feature reflects the glass towers above.
The two materials work together – glass reflects water, water reflects glass – making the entire model feel like a real city.
Miniature Figure For Sand Table Modelplaced on polished acrylic bases or near polished water features adds human scale and activity.
The contrast between the glossy environment and the matte figures is visually striking.
For moving or installing large models with polished surfaces,Sand Table Model Moving And Installationservices protect delicate finishes with foam padding and climate‑controlled transport.
Common Mistakes to Avoid
Donotuse dry sanding on thick acrylic without cooling – heat causes stress cracking.
Donotapply polishing compound before sanding is complete – scratches will still show.
Donotflame‑polish extruded acrylic – it may craze or bubble.
Donotuse paper towels for final buffing – they leave micro‑scratches.
Donotrush the grit progression – skipping grits leaves visible scratches.
Summary of Polishing Methods
| Method | Best For | Finish Quality | Speed |
|---|---|---|---|
| Progressive sanding + hand buff | Premium one‑off pieces, show faces | Highest | Slow |
| Diamond‑tool machine polishing | Long straight edges, high volume | High, consistent | Fast |
| Flame polishing | Simple edges, speed over perfection | Good | Very fast |
| Wet sanding + buffing (resin) | Epoxy water features | Mirror | Medium |
Conclusion
TheArchitectural Model Surface Polishing Processtransforms raw materials into professional, presentation‑ready finishes.
Whether you are polishing acrylic windows for aTransparent Glass Building Sand Model, creating shimmering lakes for aSimulation Water Landscape Sand Table Model, achieving aHigh Gloss Finish Architectural Sand Modelfor a luxury sales center, or protecting polished surfaces withSand Table Model Anti Aging Maintenance, the principles are the same: progressive sanding, careful polishing, and the right technique for each material.
Master the polish. Elevate your model.
Ready to achieve professional‑grade surface finishes on your architectural model? Request a consultation with your project specifications. Get a response within 48 hours.


