Case study on the production of a large-scale clock gear demonstration model
I. Core Process and Material Selection
3D printing technology: Utilizing stereolithography (SLA) technology, it relies on the photopolymerization characteristics of photosensitive resin to construct models layer by layer. Photosensitive resin is divided into two categories: the main gear adopts high-toughness photosensitive resin (impact-resistant and wear-resistant), while the base and other load-bearing components use transparent photosensitive resin (to simulate the texture of glass); key gears (such as the second wheel) are made of fiber-reinforced modified resin (containing 15% glass fiber to strengthen the tooth surface strength). Before printing, the resin needs to be preheated to 40°C to reduce viscosity and ensure smooth molding.
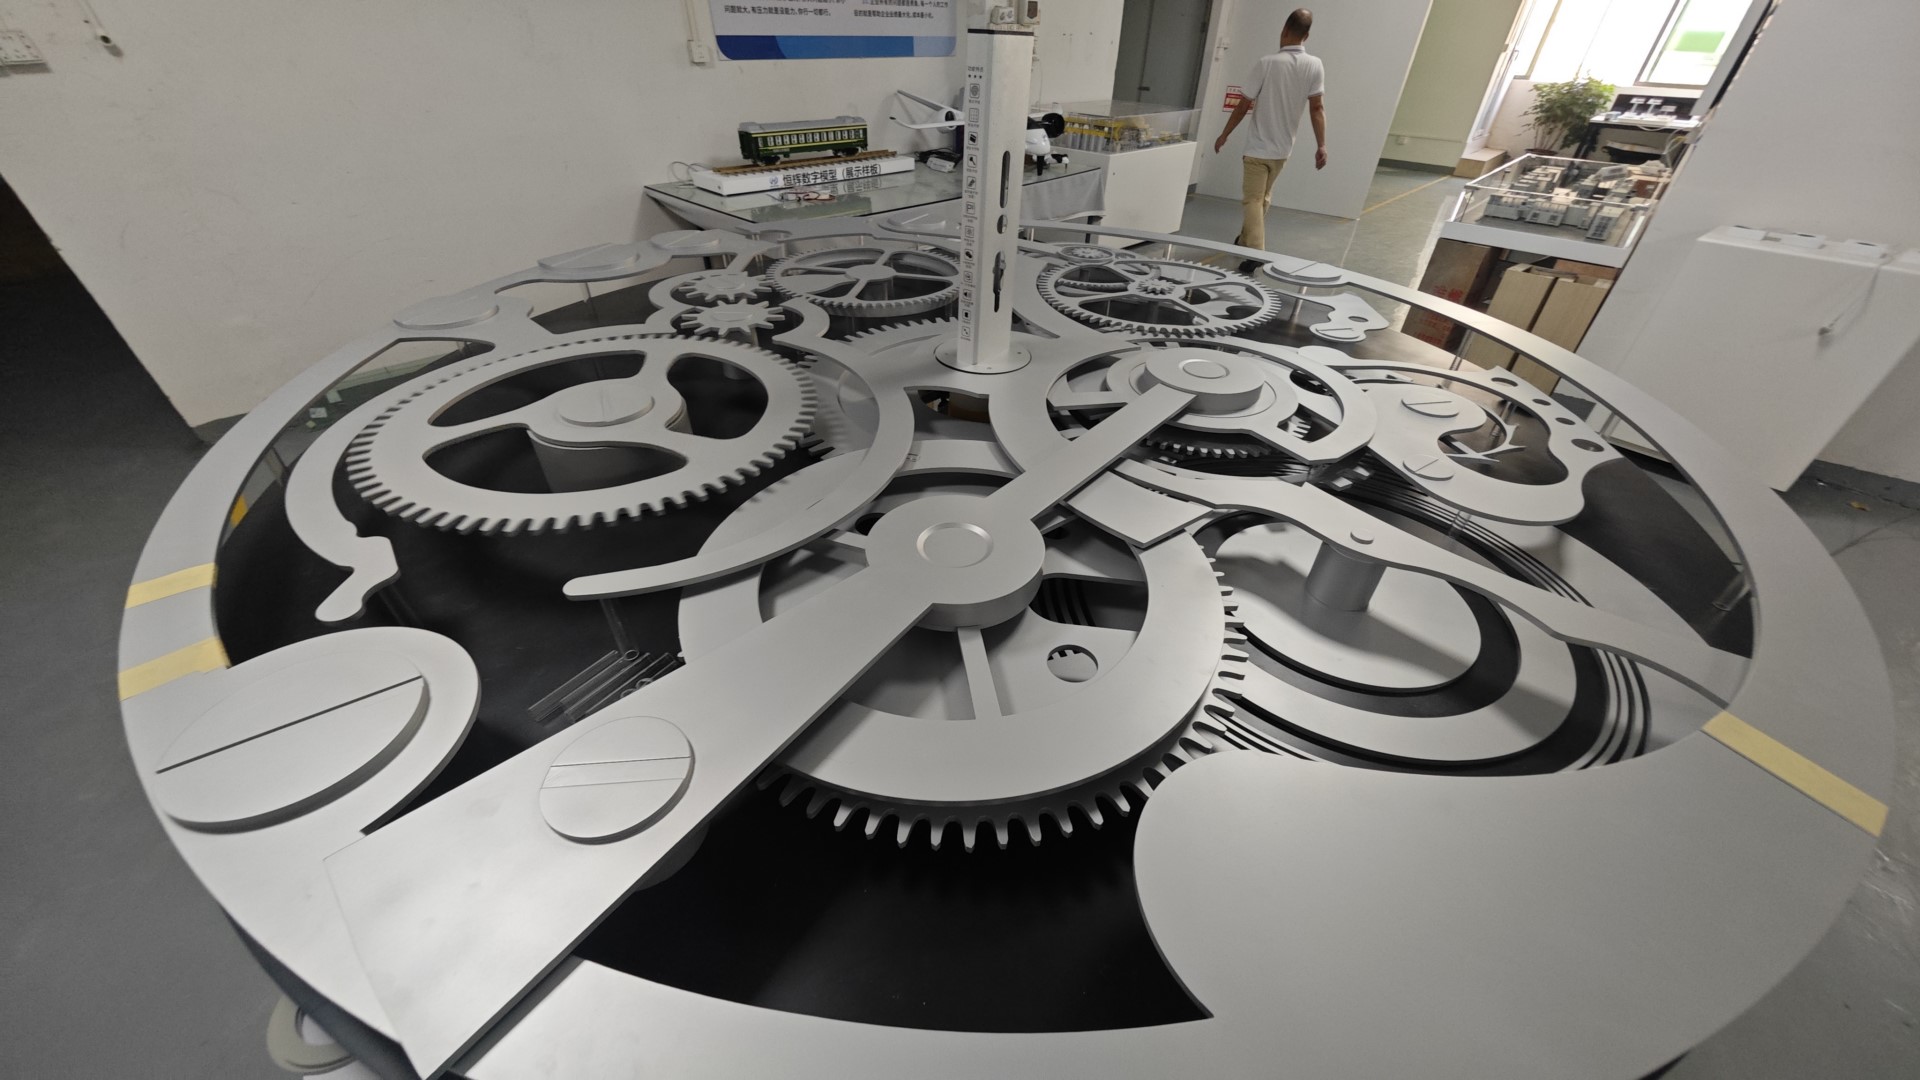
Auxiliary materials: stainless steel drive shaft (8mm diameter solid rod), brass bearing sleeve (8mm inner diameter), high-strength structural adhesive (acrylate), used for rigid connection and rotational support of the gear set.
II. Full 3D printing process
1. Model partitioning and slicing optimization
Structural disassembly: The overall model with a diameter of 2.2 meters is disassembled into seven major modules (driving wheel set, driven wheel set, dial, support column, etc.), with the largest single print piece controlled within 400×400×150mm (matching the molding size of the workshop SLA printer). The key gears adopt a "separate printing + fitting and splicing" design. For example, the main gear with a diameter of 1.2 meters is divided into six petals along the radial direction, with three M6 threaded holes reserved on each petal for assembly.
Slice parameters: The tooth profile area is printed with a layer thickness of 0.05mm to ensure clear contours of the tooth tip and root; the non-functional surface (such as the back of the gear) is printed with a layer thickness of 0.1mm to speed up the process. The support type is selected as "tree support", with a support density of 30%, and the diameter of the contact surface with the model is ≤0.8mm, reducing the workload of post-processing.
2. Printing process and quality control
Equipment debugging: Use a 600mm build-width SLA printer. Before starting, calibrate the laser spot diameter (ensure it is ≤0.1mm) and level the printing platform with a level meter (with an error of ≤0.02mm/m). During printing, control the environmental temperature at 25±2℃ and humidity at 50%-60% to avoid uneven resin curing.
Layered printing: The printing of a large gear takes about 18 hours per lobe, during which the molding quality is checked every 2 hours, with a focus on observing whether there is sagging at the tooth root (compensated by adjusting the laser power). For fine tooth components such as those with 290 teeth, immediately use bamboo tweezers to gently remove the supports after printing is complete to prevent the tooth tips from breaking when the resin is not fully cured.
III. Post-processing and detail refinement
1. Support removal and surface polishing
Initial processing: After removing the printed part from the platform, first use a surgical scalpel to make a circular cut along the support root (with the blade at a 15° angle to the model surface), and then place it in an alcohol ultrasonic cleaner (with a concentration of 95%) for 15 minutes to remove the uncured resin on the surface.
Fine polishing: The gear tooth surface is polished unidirectionally along the tooth direction using 400-grit sandpaper (to avoid transverse scratches affecting meshing), and the tooth tip is rounded (R0.3mm). The joint seam is wet-polished with 800-grit water sandpaper, and after polishing, it is dried with a hair dryer. The flatness is checked (using a 200mm straightedge for measurement, with gaps ≤0.1mm).
Secondary curing: Place all components into a 385nm ultraviolet curing oven and cure them in 3 sessions (30 minutes each, with a 10-minute cooling interval), ensuring complete cross-linking of the resin and enhancing the bending strength.
2. Coloring and antique finish craftsmanship
Primer treatment: Spray epoxy primer (gray, film thickness 30μm) on the resin surface, allow it to dry naturally for 4 hours, and then lightly sand it with 1000-grit sandpaper to remove paint particles. For transparent bases, a layer of transparent primer should be sprayed first, followed by polishing with a wool wheel until the light transmittance reaches ≥90%.
Topcoat and Texture Creation: The main gear is coated with a matte silver-gray metallic paint (self-drying, with a film thickness of 40μm). The "cross-hatch method" (one pass in the horizontal direction + one pass in the vertical direction) is used to ensure uniform coating. After the topcoat dries completely (24 hours), the gear edges and corners are lightly rubbed with No. 0000 steel wool to simulate natural wear caused by long-term meshing. The tooth root is hand-painted with black acrylic paint, and then lightly patted with a cotton cloth dipped in alcohol to create an oil stain deposition effect.


