The entire process of 3D printing and manufacturing industrial drone models
1. Material selection and pretreatment
Based on the structural characteristics of the actual drone, we have carefully selected ABS engineering plastic as the main material for the drone body. This material combines high strength with ease of processing, accurately presenting the streamlined shell of the drone. The propeller is made of nylon and fiberglass composite material, which undergoes a 120°C constant temperature baking to eliminate internal stress, ensuring the blade's toughness and impact resistance. To ensure printing accuracy, all materials undergo moisture content testing (controlled below 0.1%) to avoid bubbles or cracking during the printing process.
II. 3D Modeling and Printing Process
Reverse modeling
The technical team utilized a 3D scanner to conduct 1:1 data acquisition of the actual aircraft, and employed Geomagic software to repair point cloud data, with a focus on optimizing the transition of the fuselage surface and the connection details of the propeller arms. During modeling, special attention was paid to preserving the characteristic six-propeller layout and streamlined cabin design of the actual aircraft, ensuring that the contour error between the model and the actual aircraft was controlled within 0.5mm.
Layered printing and support design
Using Fused Deposition Modeling (FDM) technology, the print layer height is set to 0.15mm, and "tree-like support" is enabled for shell components to reduce material waste. During the printing process, nozzle temperature and platform levelness are monitored in real-time. For complex curved surfaces such as the engine compartment, the "local dense slicing" process is adopted to ensure clear details. The main body of the aircraft is printed in 6 modules, with each module taking about 8 hours to print. The entire process is monitored by a camera to prevent edge warping.
Post-processing polishing
After printing is completed, use 180-grit sandpaper to manually polish the remaining traces of support, and then use 320-grit sandpaper for fine polishing, focusing on the joint between the propeller arm and the fuselage to ensure a smooth transition. For the propeller blades, adopt the "wet sanding method with water sandpaper", polishing while rinsing with clean water to avoid powder residue affecting the surface finish.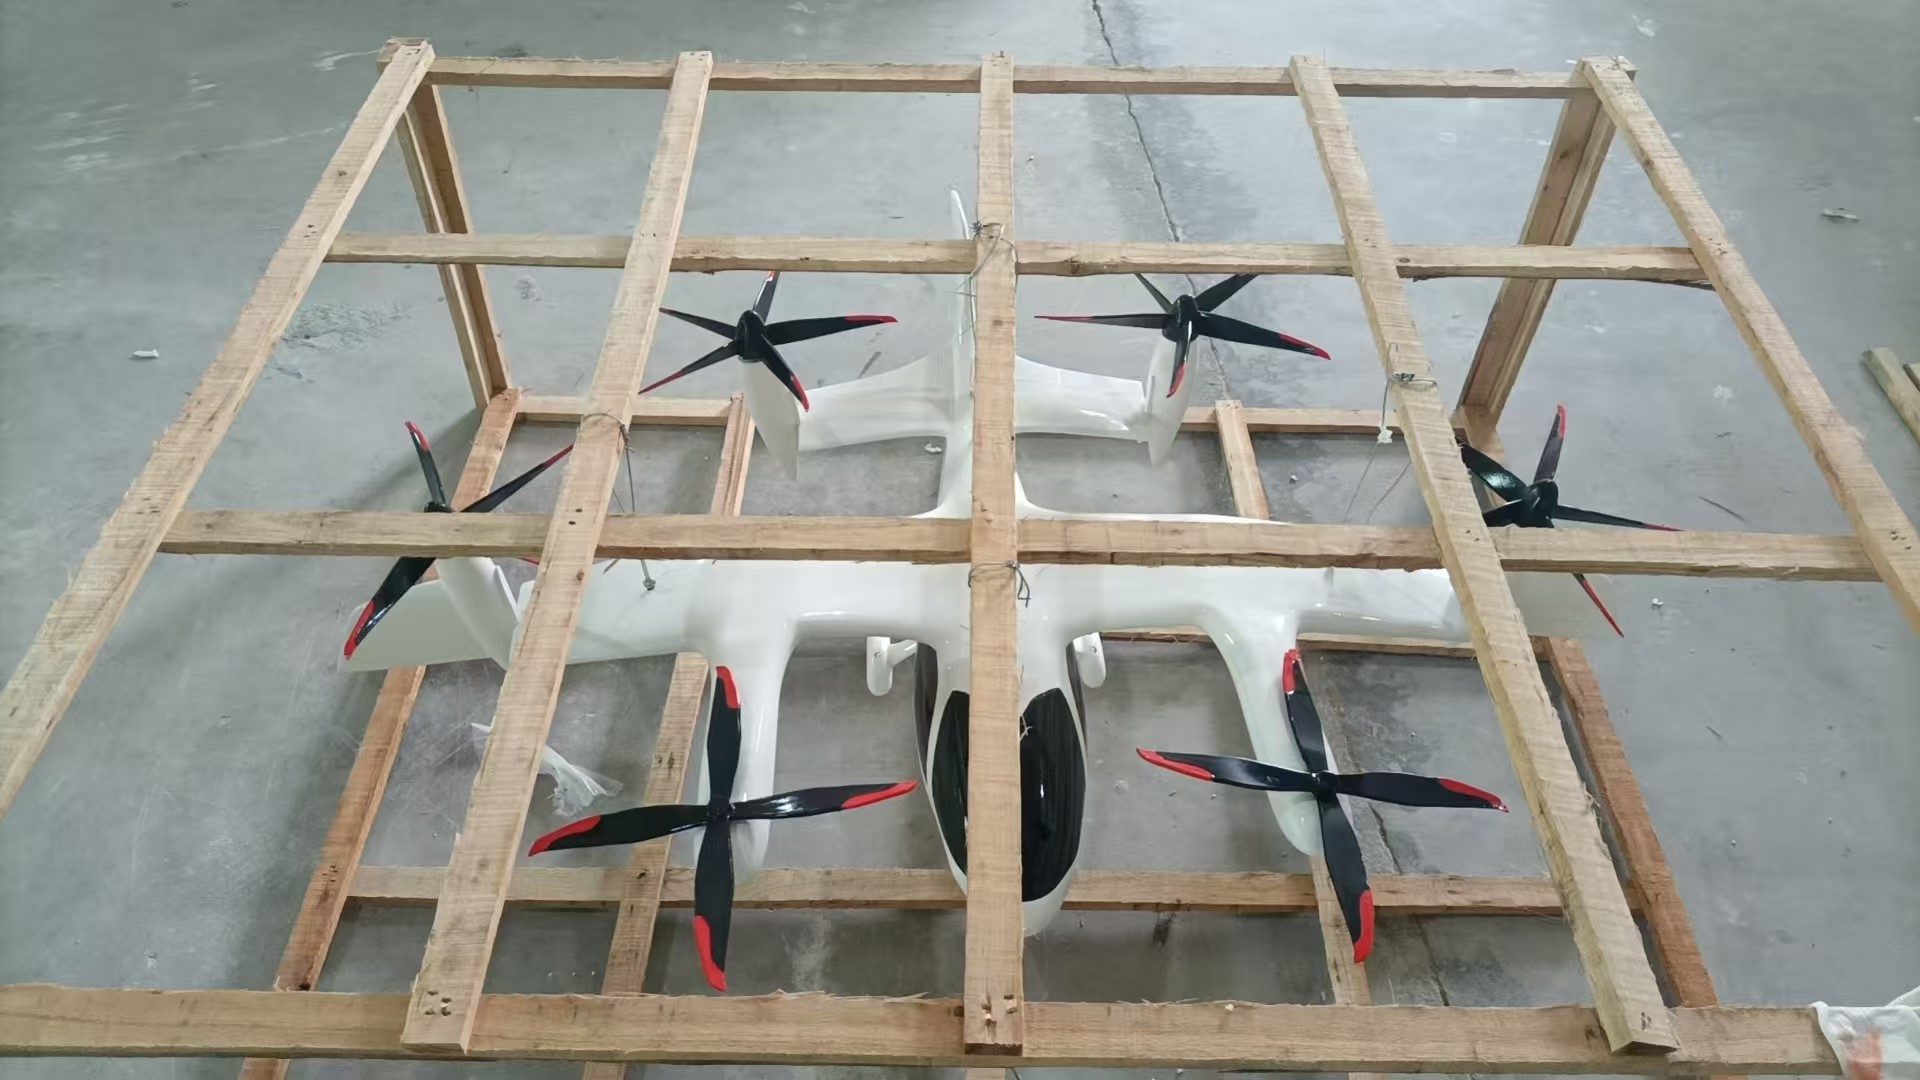
III. Structural assembly and precision control
We have customized a pine positioning jig frame (as shown in the picture), which utilizes a tenon and mortise structure to build a hexagonal fixed framework, ensuring that all six propeller arms are on the same horizontal plane. During assembly, the aluminum alloy connectors are first embedded into the printed shell, and then rigidly fixed with M3 self-tapping screws. After the screws are pre-tightened, threadlocker is applied to prevent loosening. The cabin glass is made of 0.5mm thick acrylic plate, laser-cut into shape, and seamlessly attached to the fuselage with double-sided tape, simulating the transparent effect of a real aircraft cockpit.
IV. Surface treatment and painting process
Preprocessing
First, wipe the surface of the model with isopropyl alcohol to remove oil stains, then spray a layer of epoxy primer (drying time 2 hours). After the primer dries completely, lightly sand it with 800-grit sandpaper to enhance the adhesion of the topcoat. For the propeller blades, perform an additional "flame polishing" treatment to give the edges a unique rounded texture characteristic of the real machine.
Color separation and painting
The main body is painted with matte white polyurethane paint, applied thinly in three coats using a 0.3mm spray gun, with a 30-minute interval between each coat. The propeller blades are first sprayed with black primer, and then hand-painted with red nitrocellulose paint to create warning stripes on the leading edge. The line width is controlled at 3mm, and masking tape is used to assist in positioning to ensure neat edges. The fuselage markings are created using UV transfer printing technology, with character clarity reaching 0.1mm, fully matching the markings of the actual aircraft.
Protective coating
Finally, spray transparent protective paint (with a glossiness of 60%) to form a 0.05mm thick protective film, enhancing the scratch resistance of the model. After drying, conduct an adhesion test (cross-cut method) to ensure that the coating does not peel off and meets the display requirements.


